
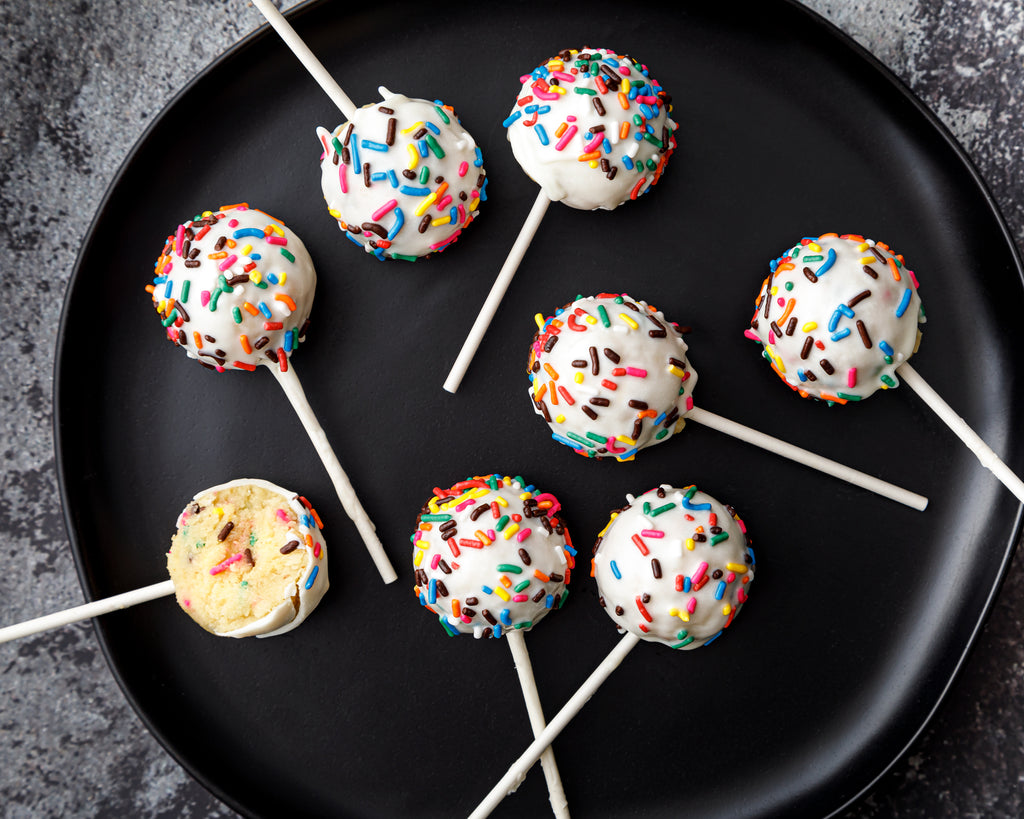
Are you ready to add a little fun and whimsy to your kitchen? Look no further than these delightful and delicious Confetti Cake Pops! Everyone knows that every food tastes better when it's delivered on a stick, and cake is no exception.
Plus, they're not only fun to eat, but fun to make, especially with kids! Why not make it an edible arts and crafts afternoon with the whole family gathered around to decorate?
My favorite part is using the PantryChic Smart Storage System to dispense rainbow sprinkles into the cooked cake pop batter. Sometimes the PantryChic can feel a bit magical as it measures and dispenses for you, and there's nothing more magical than watching it rain colorful sprinkles!
So, grab a few aprons, enlist some little helpers, and let's get poppin'!
SmartCanister Lineup
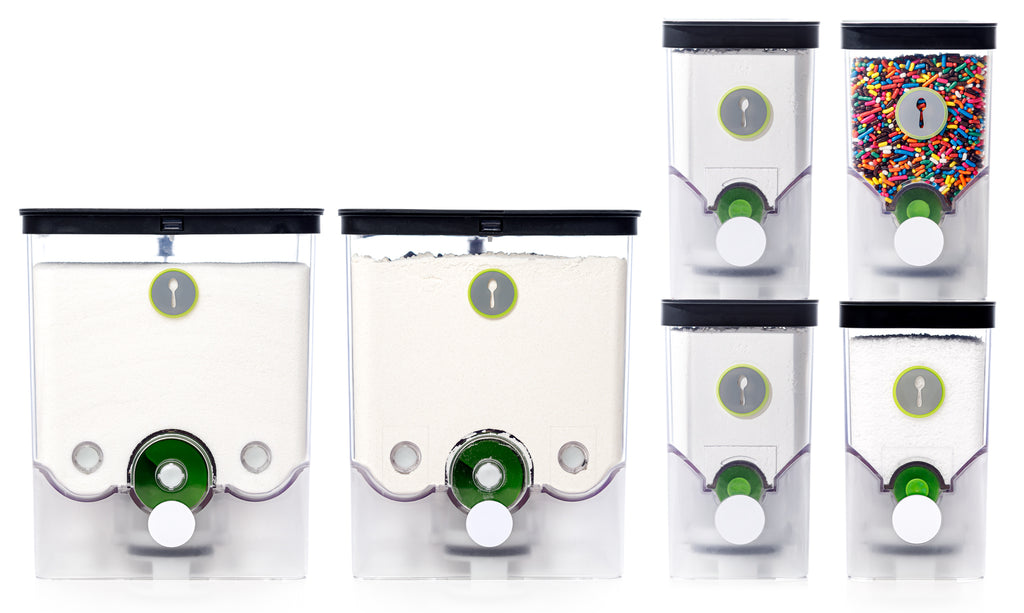
This recipe is made easiest if you are using PantryChic SmartCanisters to store granulated sugar, all-purpose flour, baking powder, baking soda, salt, and rainbow sprinkles.
If you are not already storing all of these ingredients in their own SmartCanister, you can always use the PantryChic's scale function to manually add an ingredient.
Mix the Wet Ingredients
Place oven rack in the center position and preheat oven to 350°F. Grease a 9x13-inch baking dish with nonstick spray, vegetable oil, or butter.
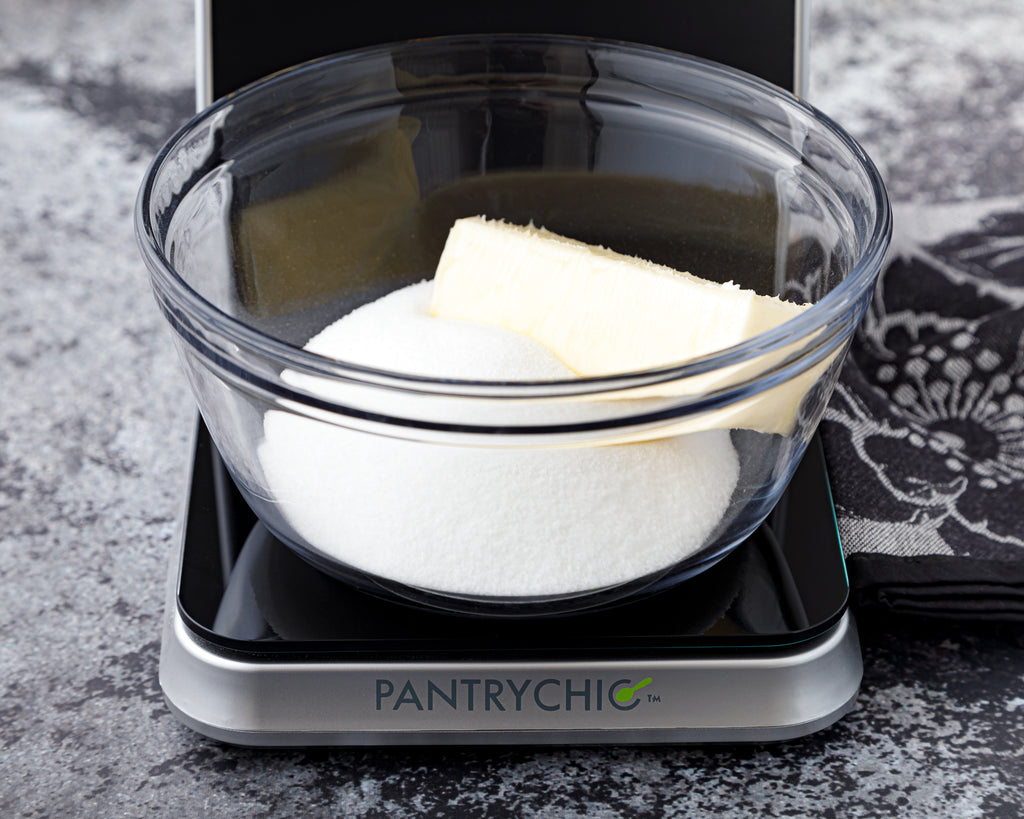
Place the bowl of an electric mixer on the PantryChic scale. Dispense 1 cup sugar. Add the butter and beat on medium speed until creamed together. Add the eggs and vanilla and continue beating until combined.
Mix the Dry Ingredients
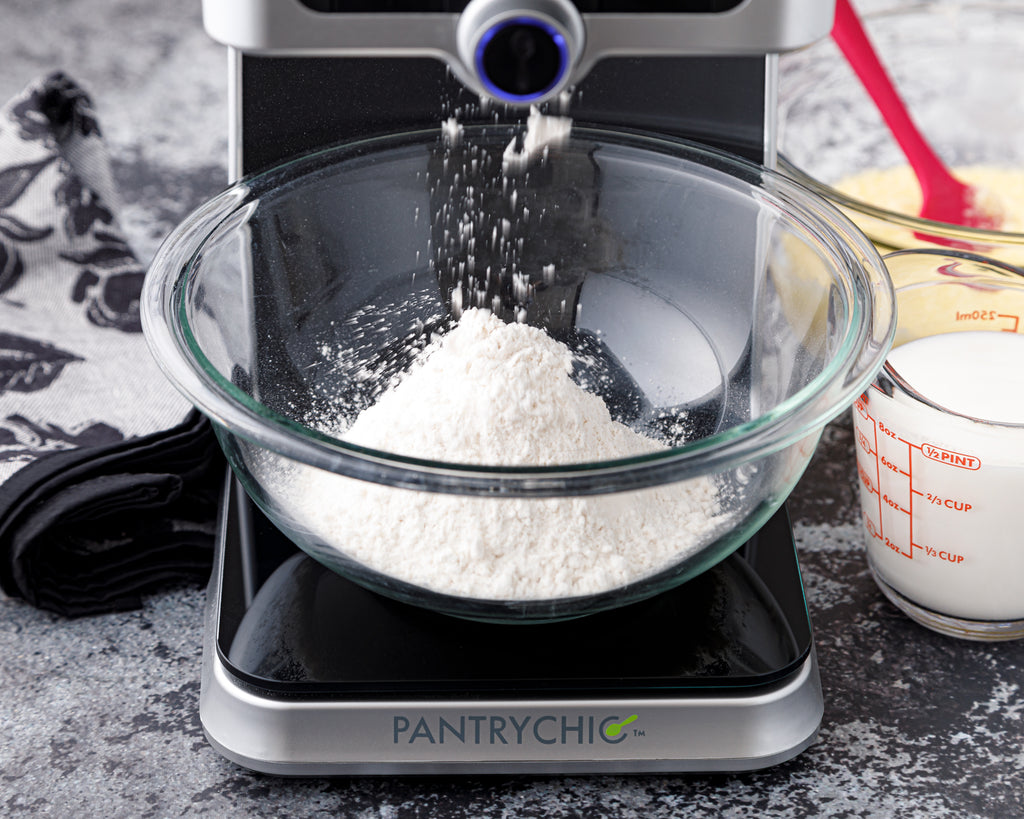
Place a large mixing bowl on the PantryChic scale. Dispense 2 cups all-purpose flour, 1 teaspoon baking powder, 1 teaspoon baking soda, and 1/4 teaspoon salt. Stir together.
Mix Together and Bake
To the wet ingredients in the electric mixer, add the dry ingredients and milk a little at a time, alternating between each, until all is combined into a smooth batter.
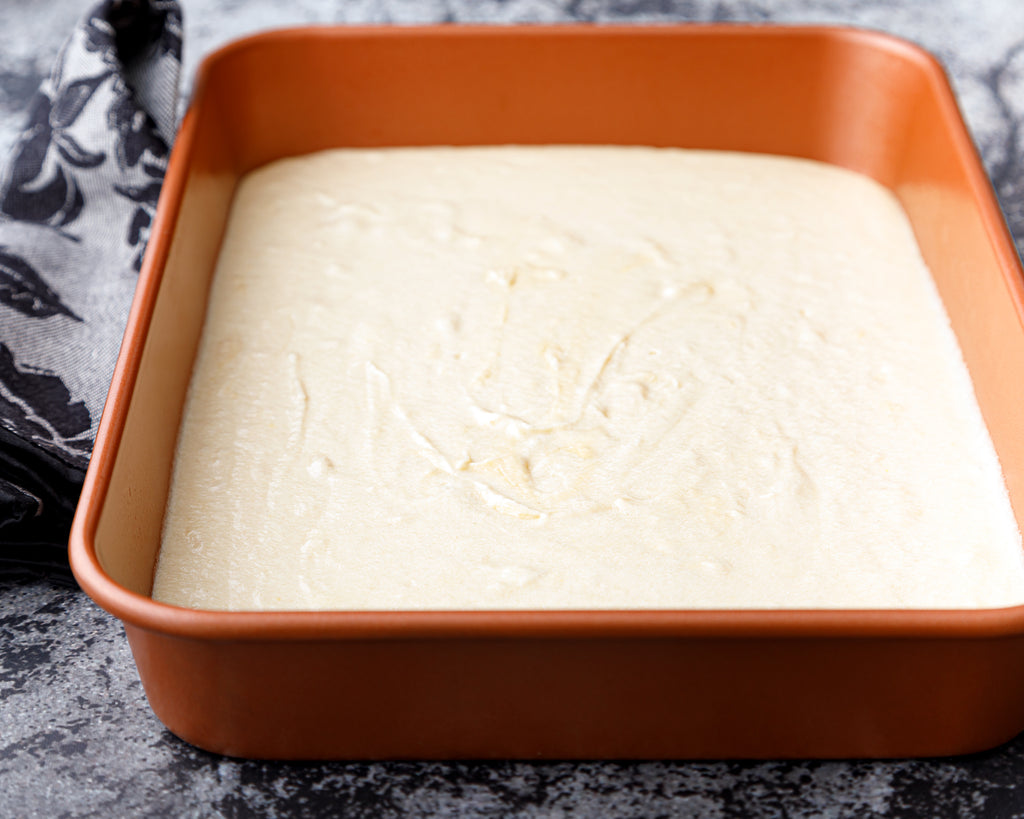
Pour the batter into the prepared baking dish. Bake 20–23 minutes, just until the center has puffed up and a toothpick inserted into the center comes out clean. Let cool completely.
Clean and Crumble
Trim the browned edges off the sides of the cake and scrape the browned layer off the top, discarding. This will leave you with the cleanest yellow cake for the nicest looking cake pops.
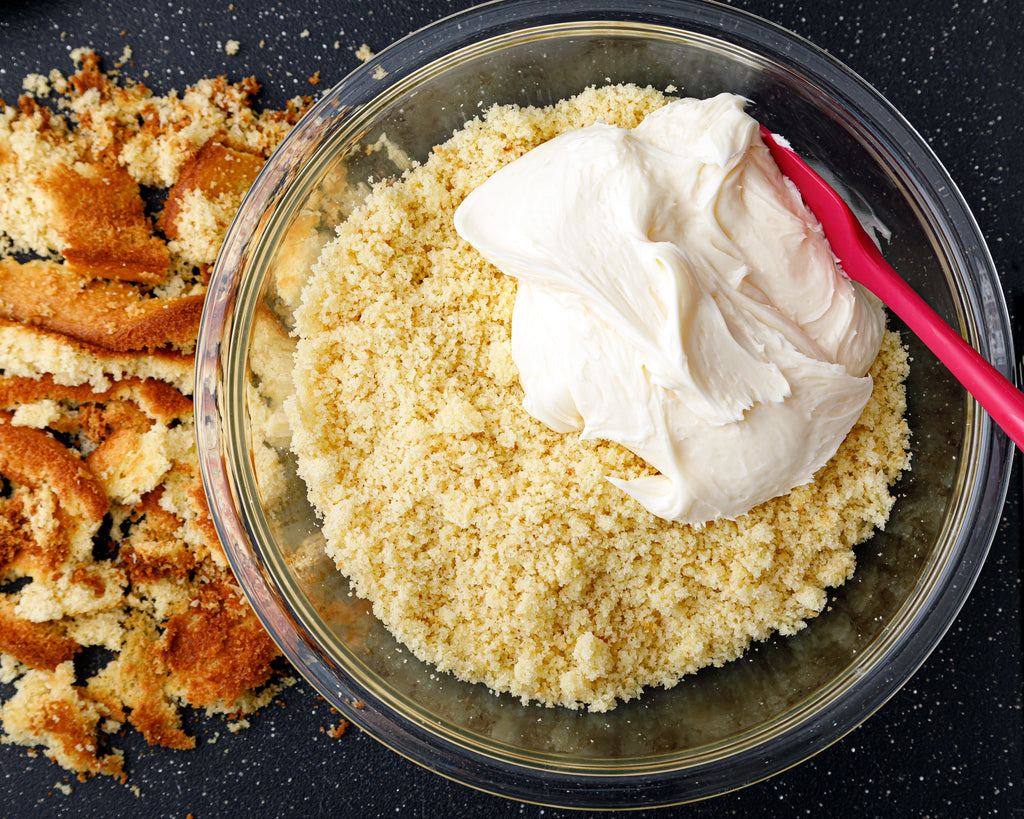
Using clean hands, finely crumble the cake into a mixing bowl. Fold in frosting until a sandy dough has formed.
Dispense the Sprinkles!
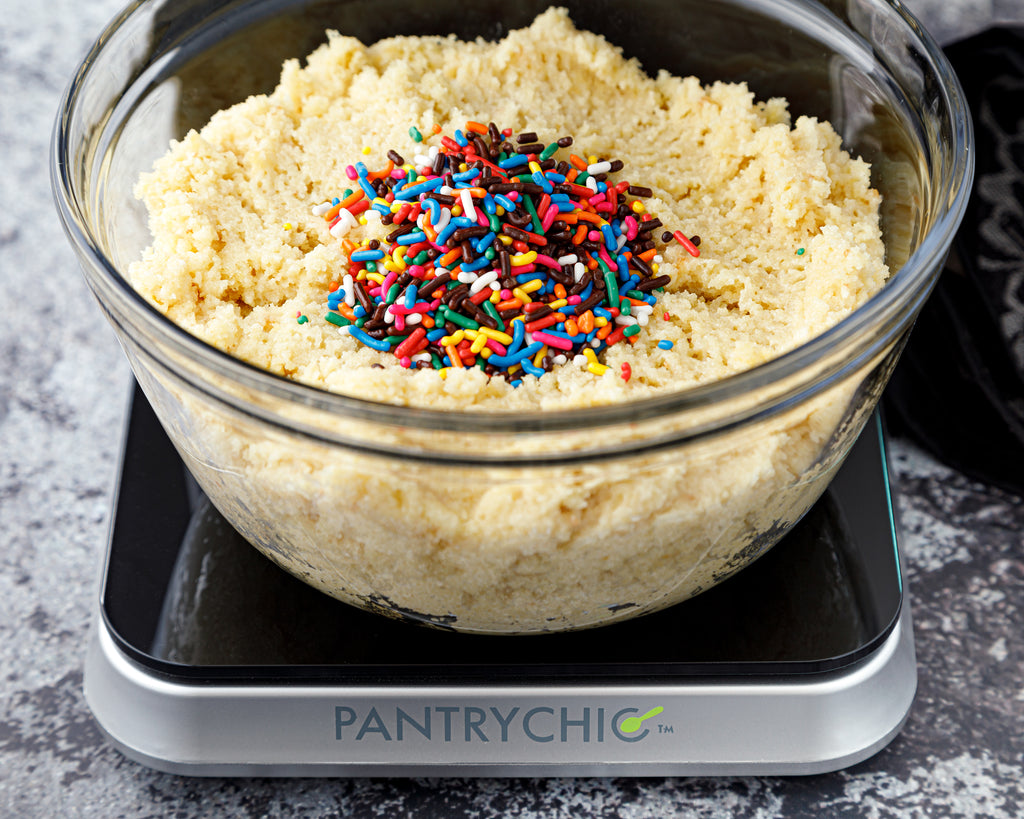
Place the bowl of dough on the PantryChic scale and dispense 3 tablespoons of sprinkles. Fold into the dough. Cover and refrigerate 1 hour.
Roll Into Balls

Using clean hands, tightly roll balls of the dough, transferring to a sheet pan lined with parchment paper as you go. Refrigerate an additional hour.
Secure the Sticks
In a microwave-safe bowl or large mug, melt candy melts or white chocolate melting wafers by microwaving in 30-second intervals, stirring between each, just until smooth.
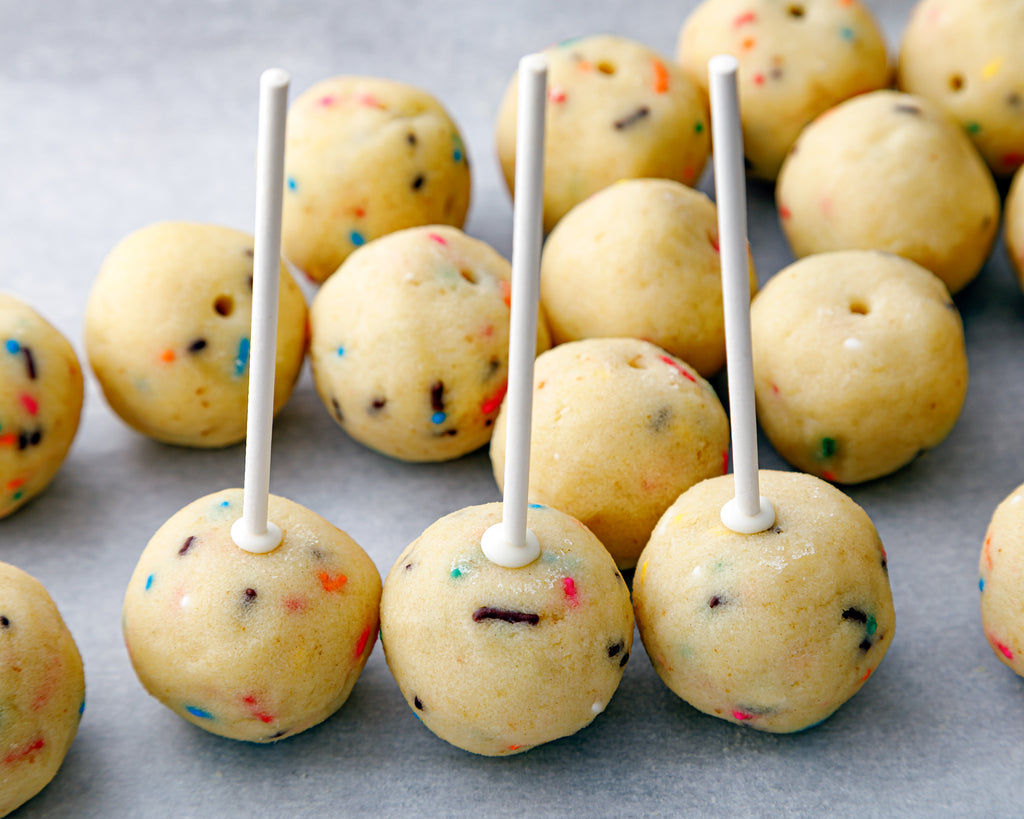
Dip each lollipop stick into the melted chocolate and then stick into the center of a cake ball. As the chocolate hardens it will help hold the cake to the stick.
Dip and Decorate!
Once all sticks are in place, you can begin coating the cake pops, starting with the first one you placed a stick into and working in the same order as before. Dip each cake pop into the melted chocolate, twirl off any excess, then immediately sprinkle additional sprinkles over top. Work over a baking sheet to catch excess sprinkles.
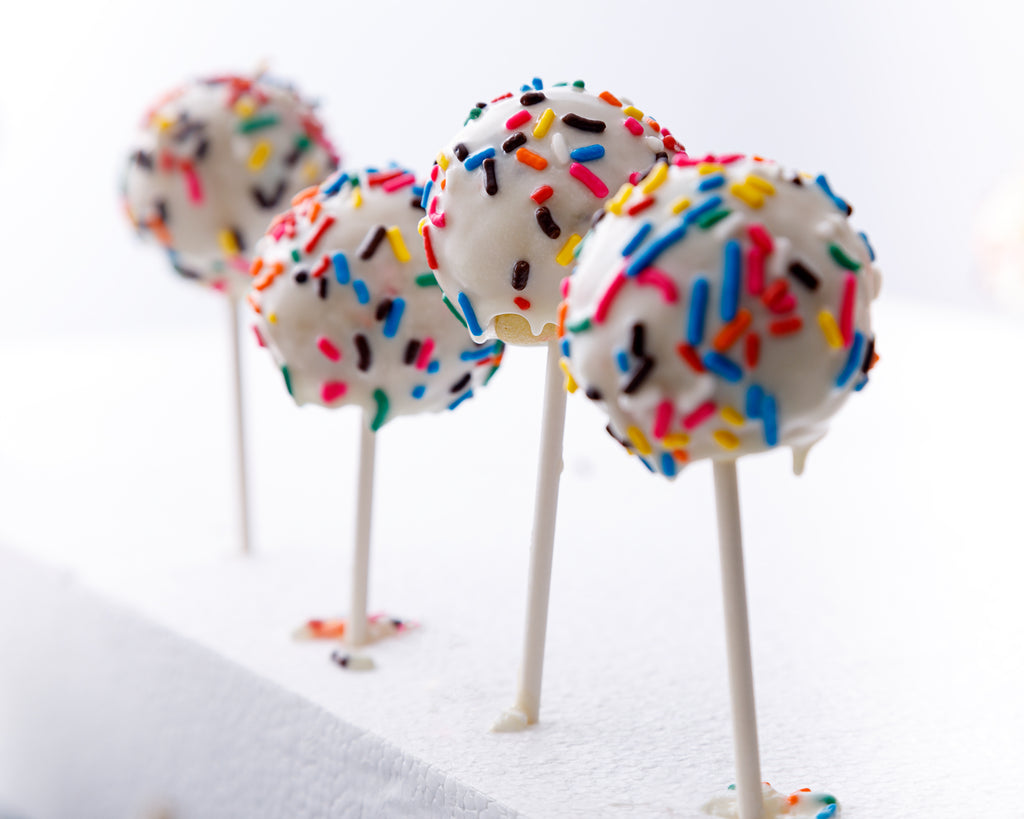
Once each is decorated, stick into a piece of Styrofoam or a box with small holes to hold the cake pops upright as they set. Cake pops will be fully set and ready to eat in 10 minutes.
Recipe: Confetti Cake Pops
Active Prep Time: 1 hour ∙ Cook Time: 23 mins ∙ Makes: 24
SmartCanister Ingredients
1 cup (200g) granulated sugar
2 cups (250g) all-purpose flour
1 teaspoon (3.5g) baking powder
1 teaspoon (4.6g) baking soda
1/4 teaspoon (1.5g) salt
3 tablespoons (36g) rainbow sprinkles, plus more to decorate
Other Ingredients
1/2 cup (92g) butter
2 large eggs
2 teaspoons (10g) vanilla extract
1 cup (245g) whole milk
16 ounces vanilla frosting, store-bought or homemade (recipe below)
24 lollipop sticks
1 package white candy melts or white chocolate “melting wafers”
DIRECTIONS
- Place oven rack in the center position and preheat oven to 350°F. Grease a 9x13-inch baking dish with nonstick spray, vegetable oil, or butter.
- Place the bowl of an electric mixer on the PantryChic scale. Dispense 1 cup sugar. Add the butter and beat on medium speed until creamed together. Add the eggs and vanilla and continue beating until combined.
- Place a large mixing bowl on the PantryChic scale. Dispense 2 cups all-purpose flour, 1 teaspoon baking powder, 1 teaspoon baking soda, and 1/4 teaspoon salt. Stir together.
- To the wet ingredients in the electric mixer, add the dry ingredients and milk a little at a time, alternating between each, until all is combined into a smooth batter.
- Pour the batter into the prepared baking dish. Bake 20–23 minutes, just until the center has puffed up and a toothpick inserted into the center comes out clean. Let cool completely.
- Trim the browned edges off the sides of the cake and scrape the browned layer off the top, discarding. This will leave you with the cleanest yellow cake for the nicest looking cake pops.
- Using clean hands, finely crumble the cake into a mixing bowl. Fold in frosting until a sandy dough has formed.
- Place the bowl of dough on the PantryChic scale and dispense 3 tablespoons of sprinkles. Fold into the dough. Cover and refrigerate 1 hour.
- Using clean hands, tightly roll balls of the dough, transferring to a sheet pan lined with parchment paper as you go. Refrigerate an additional hour.
- In a microwave-safe bowl or large mug, melt candy melts or white chocolate melting wafers by microwaving in 30-second intervals, stirring between each, just until smooth.
- Dip each lollipop stick into the melted chocolate and then stick into the center of a cake ball. As the chocolate hardens it will help hold the cake to the stick.
- Once all sticks are in place, you can begin coating the cake pops, starting with the first one you placed a stick into and working in the same order as before. Dip each cake pop into the melted chocolate, twirl off any excess, then immediately sprinkle additional sprinkles over top. Work over a baking sheet to catch excess sprinkles.
- Once each is decorated, stick into a piece of Styrofoam or a box with small holes to hold the cake pops upright as they set. Cake pops will be fully set and ready to eat in 10 minutes.
If the coating cracks: The cake is too cold. Ideally, when you start the center of each ball will be cold to allow the sticks to set in place but the outside will have slightly warmed up for dipping in the hot coating.
If the coating cools: As you work, you can always reheat the candy melts or chocolate for 15 seconds here or there to make it easier to work with. That said, they have a tendency to thicken each time they are heated, so work fast and limit reheats.
If the coating is too thick: The candy melts or chocolate wafers can be thinned out with a teaspoon or two of vegetable shortening or coconut oil that is a solid when cooled. Do not use a liquid oil or the coating will not set.
Homemade Buttercream Frosting
In an electric mixer, beat together 1/2 cup (92g) softened butter, 2 1/2 cups (300g) powdered sugar, 2 tablespoons (30g) milk, and 1 teaspoon (5g) vanilla extract. If the mixture is thin, add additional powdered sugar a tablespoon at a time, until stiff.